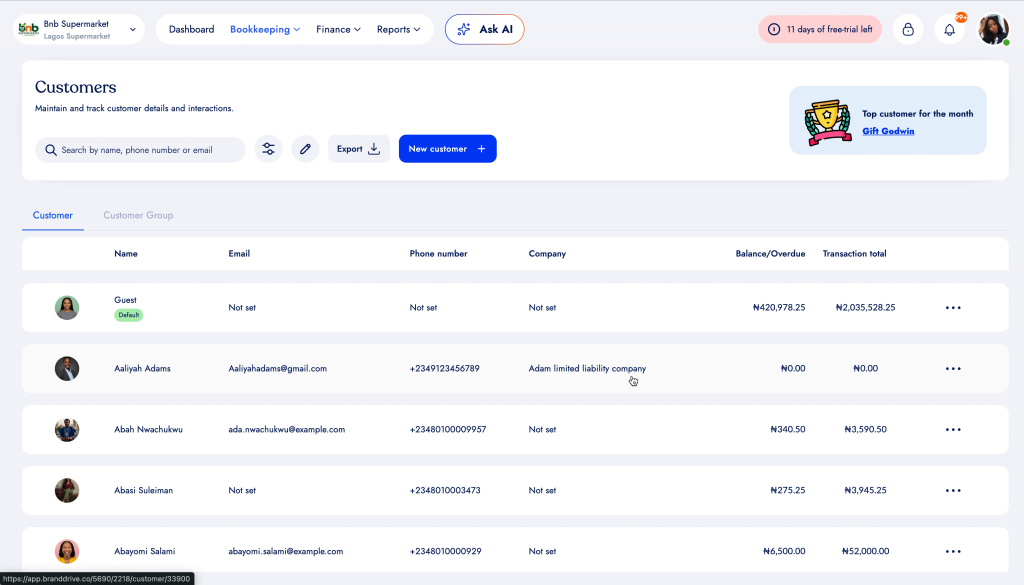
Adding customers to BrandDrive helps you keep customer information organised and makes it easier to manage their transactions, balances and activity from one place.
1. Open Customers
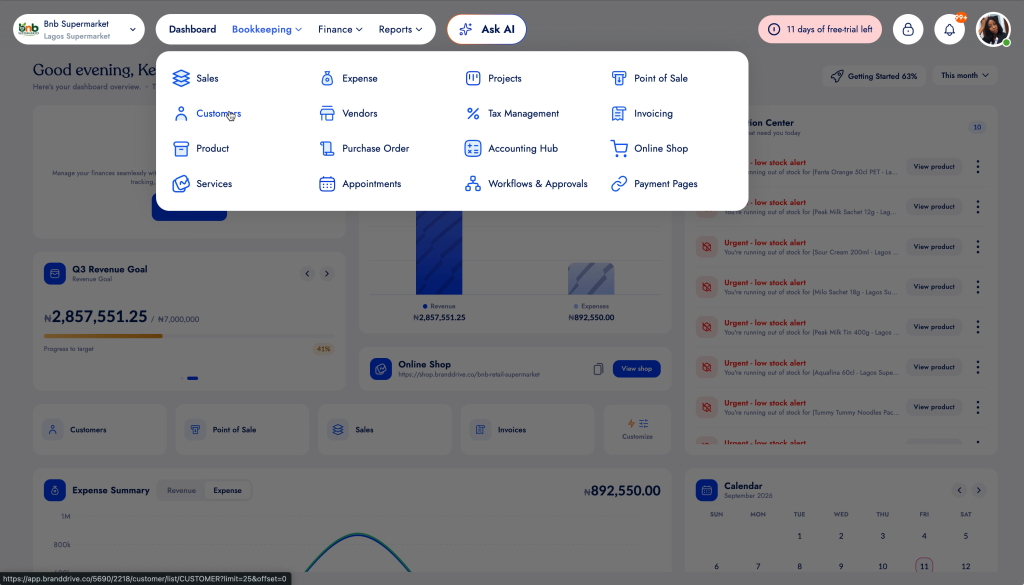
From your BrandDrive dashboard, go to Bookkeeping and select Customers.
2. Start a new customer record
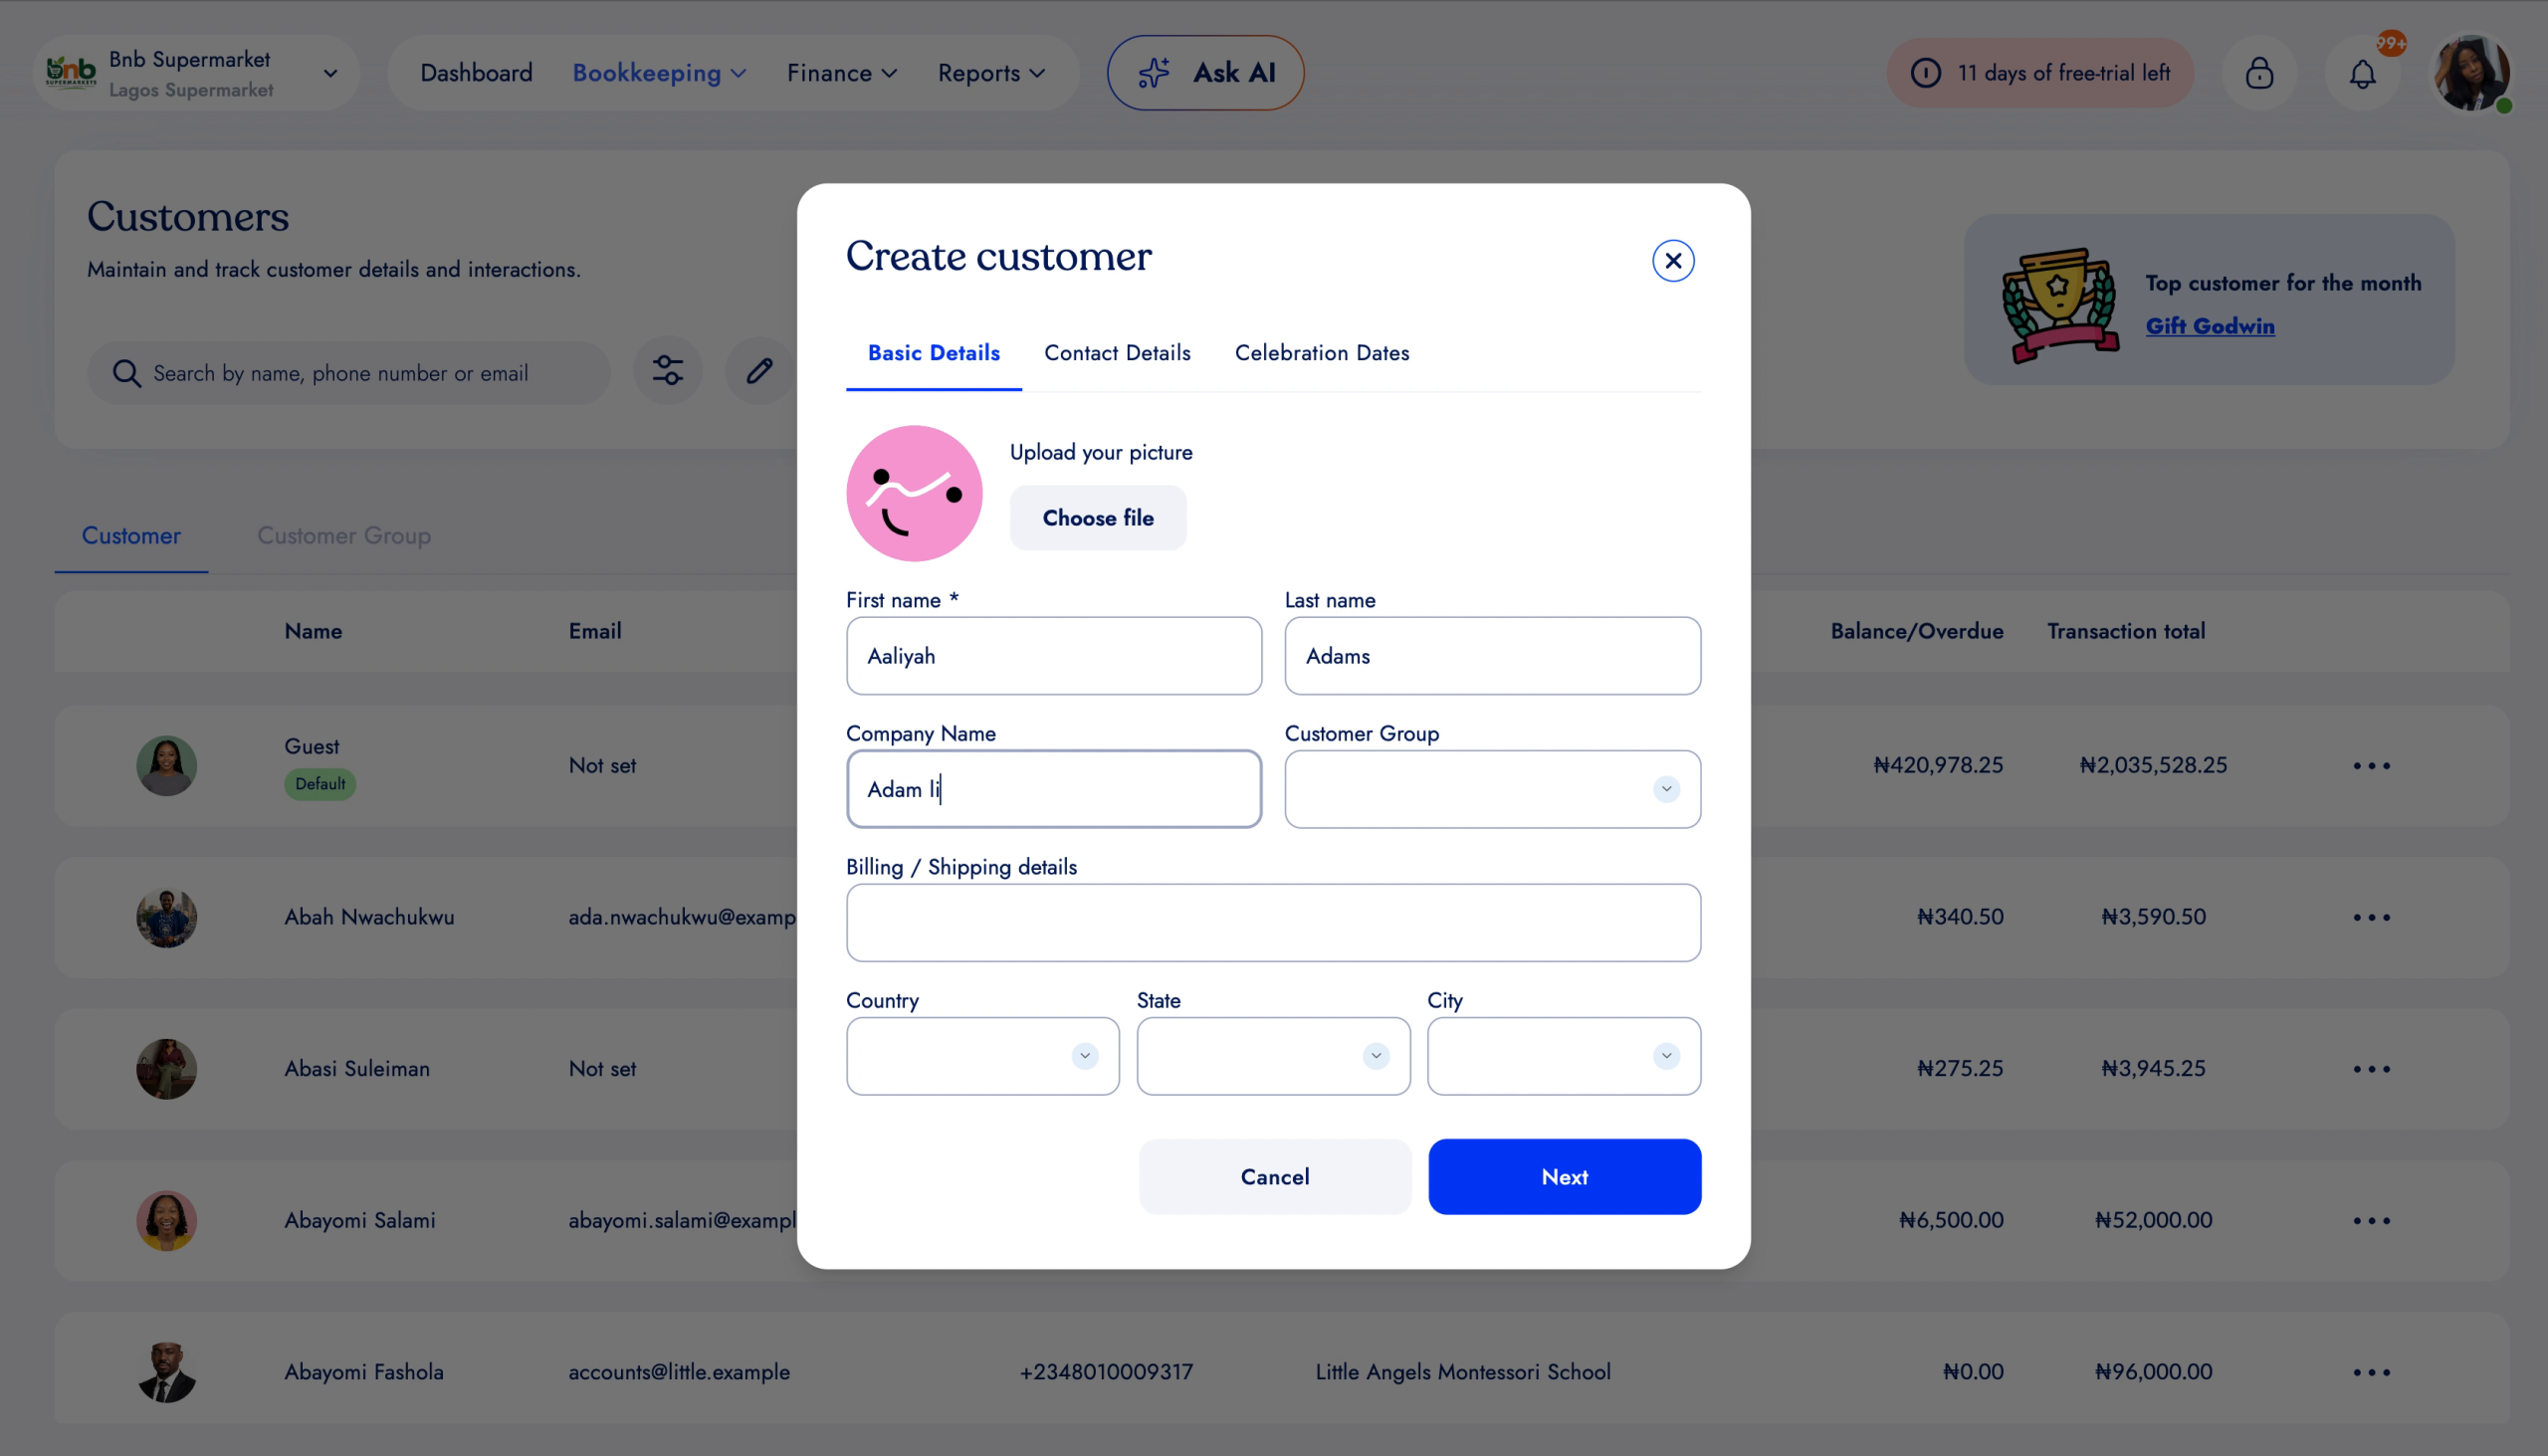
On the Customers page, click Add Customer. This opens the Create customer form.
3. Enter the customer’s basic details
Under Basic Details, enter the information available for the customer. This can include their name, company information, customer group and address details.
Tip: Complete the fields that are relevant to the customer. You can keep the record focused on the information your business actually needs.
4. Add contact information
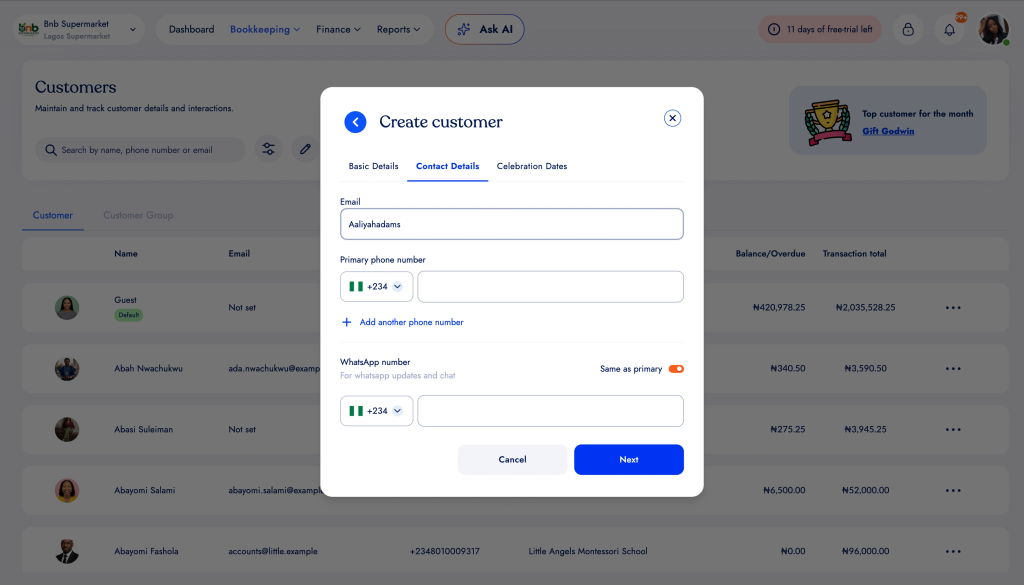
Open Contact Details and enter the customer’s contact information, such as their email address and phone number. Where applicable, you can also add their WhatsApp number.
5. Add celebration dates
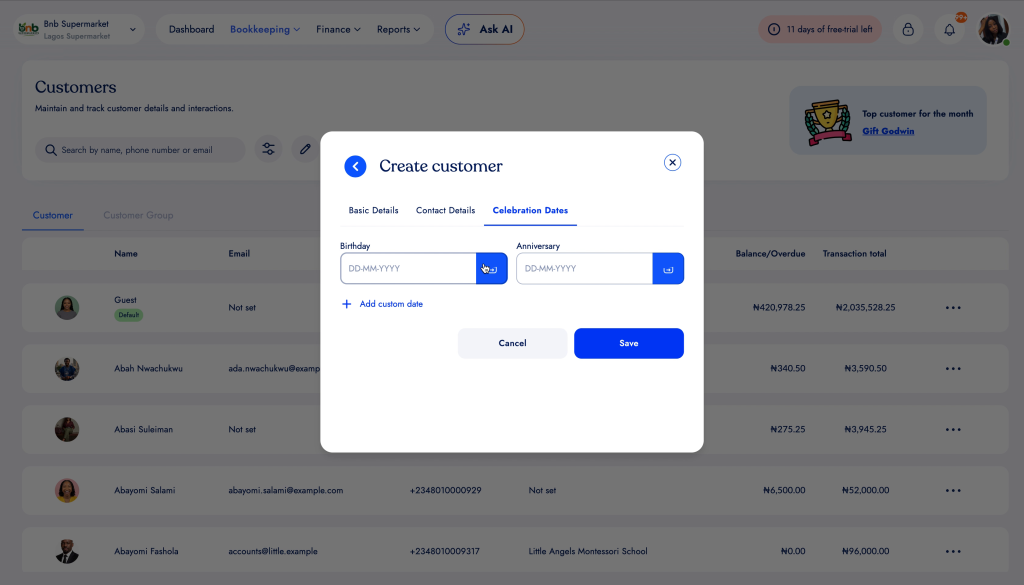
Open Celebration Dates to record important dates associated with the customer. Add the relevant date and label it appropriately.
6. Save the customer
Review the information you have entered, then click Save. The customer will be added to your customer list.
What happens next?
After creating the customer, select their name from the customer list whenever you need to open their profile and review the information and activity associated with them.